Building my first portable vocal recording booth space for voice-over
- Shelley Hunter
- Jul 29, 2025
- 18 min read
Updated: Mar 27

Hi everyone,
This post has been a long time coming, but I've finally put in the time to write this blog.
This is mostly me discussing how I made my first vocal booth space, however I guess it could be considered a tutorial of some sorts - though I'm sure there's better guides out there!
This will be a long article, so please enjoy with a cup of tea and a nice biscuit!
Small disclaimers:
Suitable for amateur/mid-weight levels.
Please read any health and safety notes carefully - I'm not responsible if you decide to build this and are not careful / don't take precautions, as you should with any DIY job.
It won't be perfect from the start, you may improve it over time - but it will be a lot better than mattress forts or nothing.
Absolutely no AI has been used to create this guide, this is all from my experience. I cannot stand reading AI-generated slop articles that are littered with mistakes and contradictions, so I'm not putting others through that pain either. Thank you!
A bit of backstory of me:
I've been working as a voice-over artist for indie and commercial projects for over 5 years.
One of the first difficulties I had as a remote voice-over artist was back when I was cast for my first "big" role. I auditioned for the project and didn't get a role. Over a year later, I was re-approached by them. I found out that I originally wasn't cast earlier on because my audio-quality wasn't good enough in my audition. But they wanted me to improve it and try again.
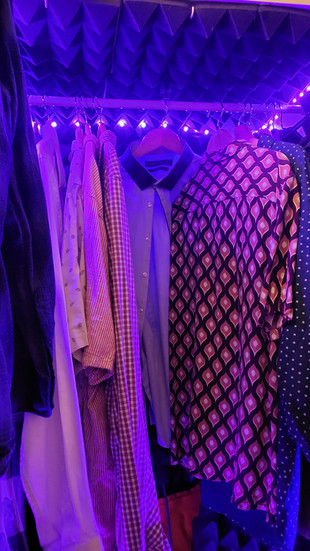
Reality was, my recording space and microphone wasn't up to scratch - a Blue Yeti microphone, recording in my wardrobe with a flimsy blanket on top. There was reverb from the room behind me, 'boxy' sounds from the wardrobe walls, no monitoring, and a HUGE hassle to put this together every time I wanted to record. Don't get me wrong - it did the job for fan-projects and indie work as a beginner, but it was hassle for anything else.
I then spent a few days frantically trying to get my space up to scratch for this client, as I didn't want to lose this dream role again. Thankfully, I succeeded with small improvements to my rough wardrobe space and a new XLR microphone - but boy was it stressful.
Photos / video of me assembling my OLD recording space:


After that role, my partner suggested making a proper vocal booth space, as he didn't want me to keep being caught off guard in the future + we can't afford to rent a local studio every time I got work. He was a huge advocate and 'do-er' of this task, I'm incredibly grateful for his help and pushing me to take VO seriously.
So I wanted to share a rough walkthrough on how we built a space that can be used for professional voice over - in hopes it may inspire or help another VA out. It's still not perfect and I try to improve it every few months - but it's a heck lot better than an open untreated room or blanket fortress over your head.
This guide is how I built my own Home Portable Vocal Booth.
Portable, as in, it's not a fixed wall setup, and if ever my landlord can't stand my silly voices anymore, I can take it down and rebuild it in a new home. 😂
Please do not take this as gospel - I'm still learning and trying to improve. However, I'm equally a walking case study of finding something that works well to get decent work with.
There are other solutions out there and video guides you can find, however if my setup guide helps even just one person - that's a success. ✊
Disclaimer:
This isn't an easy process. If you are not savvy with tools or DIY health and safety, do not attempt this; you should ask a professional instead.
The process:

Step 1: Planning
This is the most important step - do NOT rush or skip this step.
Everyone's space is different, and you need to research and plan for your space efficiently. Consider the following:
Where is your booth going?
In your bedroom? Living room? Office space? A giant hall?
Is it going to be near any noticeable noise sources; windows, doors, radiators, bathrooms, AC units, noisy roads, doors, clocks, fridges, creaky floorboards. Examine your space thoroughly and remove any noises you can.
Plug sockets - are there enough power sources around the space for your equipment?
If you lucky enough to be building in an existing closet room, some of this guide will not be relevant for you - but some tips will still be helpful!
What is going in the booth, and what will be directly outside of it?
Recording PC/Mac - in or out?
Chair, microphone stand, headphones, monitoring equipment, lighting, desk.
Room and booth space measurements:
DO NOT SKIP THIS STEP - MEASURE YOUR NEW BOOTH SPACE - DEPTH, HEIGHT AND WIDTH.
Don't make it too big or too small. Too small = going to be a nightmare to remain comfortable in for hours on end, too big = much more work needed for sound-treatment as there's more space for sound to travel in.
If it helps, I went for roughly W100cm x H230cm x D150cm. Arguably, the ceiling could be considered too high as I'm only 5ft tall and I do wish I made it a little bit wider, but with some additional treatment - it's fine.
Room treatment / further external sound-proofing options.
Budgeting for your vocal booth:
Vocal booths aren't cheap, however it is a lot cheaper to make one than buying a pre-built unit.
Pre-build booths, whether it's a portable or fixed setup, can cost thousands. If you have the budget for this and would rather spend money than time, then it can be a good option as you get all the bells and whistles with it!
However, if you're like me - someone who tries to save as much as possible unless I really have to spend money - build is the way to go.
I did lose track slightly of how much mine cost in the end, however I don't think it came to more than £600 and even that might be over-compensating (not including all my equipment of course). Whilst that might sound like a lot, for a product that is completely customised to my space and requirements, and considering how pre-built booths can go for thousands - it's not a bad price. 😅
Fire-hazards - you must ensure your new booth isn't a fire risk;
Check the materials you buy and make sure they are approved within your country's safety laws
Kept away from fire sources (e.g. candles, fireplaces, heaters, cigarettes, incense, cheap electronics and lights that get hot, etc)
Placement + making sure it isn't blocking any emergency escape routes is so important - vocal booths are big, and you must make sure when you build anything that your own safety is a priority.

Step 2: Sourcing materials
Here is a list of the things I needed to get started:
Furniture Grade PVC piping and joints (for the frame)
You need the THICK Furniture Grade ones for the frame - thin plumbing/cable pipes will bow, bend and eventually collapse - which risks damaging your expensive equipment.
I got 1/4" thick and they are perfect.
Don't forget the connecting joints! You can't just tape the booth together. You should keep it secure with different bend joints - tee, cross, 4-way, elbow.
If you are in the UK:
These cannot be bought easily from your standard B&Q, Screwfix or IKEA unfortunately. The ones in these stores will not do the job, they will bend and collapse (trust me on this). You will have to shop around for the furniture grade version - there are a couple of reputable sellers out there online.
Acoustic Sound Booth Blankets
These will be the 'walls' of your booth space. These hang from the thick pipe frame.
There are lots of different kinds you can get.
Different colours and sizes
Ones with grommets, velcro or hanging ties.
Standard or cooling materials
Door and window panels
A really popular place to get these from as VocalBoothsToGo. There are others out there, but I just wanted to mention the popular one who's name I see everywhere.
Moving blankets are also an option. I personally didn't get these, as I didn't want to spend the money on them for them to maybe not work. You'll have to do research elsewhere if you want to try these.
Important info about blankets: There is a difference between sound absorption/treatment and sound proofing.Most of these blankets will NOT SOUND PROOF your space. Don't get me wrong, they will help. But don't expect them to completely silence your violent action screaming session from outside the booth, OR for them to keep out your neighbours blaring techno music and singing (I love my neighbours dearly, I promise...). To achieve full sound-proofing, you will require additional room treatment - which I won't go into in this blog. |
Tools for building your vocal booth
You will need a few tools to build this project.
For example, we had to get a sharp handsaw, measuring tape, a 'builders sheet', STRONG zip ties, facemasks and some other small bits. Also, cleaning bits for afterwards!
You can also get an optional pipe cutting tool instead of a handsaw, which will save you a whole lot of time and arm fatigue!
Floor panels / soft rugs for the base
There is no point building this booth if you are going to have wood / hard floor at your feet - enjoy the reverberation and ruined sound if so.
I personally got some simple foam floor squares (like you'd get in gyms or play areas - be aware these can be toxic if pets or children chew/eat them). I then covered these with a nice, soft, fluffy rug - sorted!
You can also get anti-vibration floor arrangements - pricey but worth it!

Step 3: Frame construction
I'm going to start this section with another disclaimer:
This isn't an easy process. If you are not savvy with tools or DIY health and safety, do not attempt this and ask a professional instead.
I'll be honest, I'm absolutely useless with DIY - so a lot of this stage was my partners' input. If you are like me and can't do anything build-related without disaster, ask a friend, family member, or professional who is good with their hands to help you out.
First, we created a visual guide mockup in Adobe Illustrator of all the pipes and measurements we needed. This helped us in the build stage, as having that visual reference saved us so much hassle during the process.
In the mockups below, I have edited out the measurement numbers, as in the version I have, the numbers were wrong (keep reading...). But creating a guide like this with the correct measurements will help you so much.


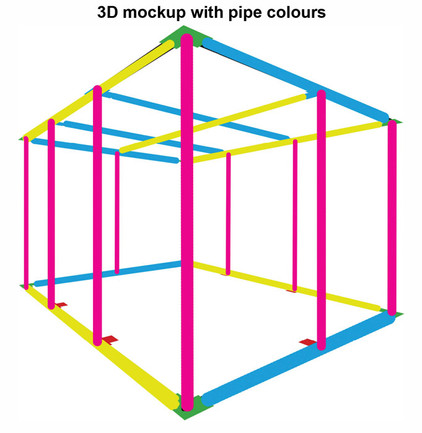


We calculated:
how many pipes we needed for each section for stable support
the lengths they had to be
the joints they needed to connect
We printed the guide out, drew extra notes on sticky notes, and marked the poles individually with pen, so that we had visual guides to cut to.
You can build your frame with as much 'support' areas as you feel appropriate. It's probably best to not have just 1 long pole on every edge, as all the weight is on 1 piece in that scenario. Try either a similar setup to the pic above or partition more if you feel necessary with your booth's size. (mines fully stable with the above, so I'm happy 🫡)
Now, when I say planning is the most important step - I mean it.
When we started the cutting stage, we realised we got some measurements wrong. We hadn't accounted for the amount of pole that went IN to the joints, so we only had measurements for the pipes you can visibly see. This was incredibly important. Thankfully, we noticed it before we cut anything - but it was a mathematical headache.
Make sure that in your build, you account for this additional length needed!


Once you have marked all your measurements - tripled checked it all, you can start cutting the pipes. We used a handsaw, and in hindsight - we wish we used a specific pipe cutting tool. It's hard work and creates a huge amount of mess with a saw.
Health & safety note:When you cut PVC, the tiny microplastics that are produced can be toxic - they can be inhaled and go into your lungs, where they will stay for years and potentially cause serious damage to your lungs. This microplastic debree will get everywhere.
As with any DIY task where cutting of plastics or wood are required, you must wear a protective face-mask, work in a ventilated area (ideally outside) and clean up everything afterwards. Keep children and pets away, as they are more at risk. The microplastic particle waste was also why we had a builders sheet underneath our table, so that we could easily transfer and dispose of the microplastic particles after we were done. (Please dispose of this plastic waste responsibly also, don't just dump it in your garden 🙈) If you can't guarantee your safety on this, get a professional to help you - you won't be able to voice act if you suffer injuries, always put safety first! Lung damage is no joke. |
The frame construction took us a couple of days to complete, it was extremely hard work. Keep your space clean, organised, and efficient.
Again, if you can't do it yourself safely, get a professional to help.

Step 4: Assembling materials
Once you have cut all your building blocks for your frame, it's time to begin your vocal booth lego build stage!
Clean, vacuum and mop the area where your booth will live - as you won't be able to easily access it again without taking bits down.
Assemble and organise your pieces, and plan how best to approach it.
We built the floor and roof frames first, then used these to slide the side pieces in from below and above. This was tricky, you will need 2-3 people to do this and you should be careful as you do it.
(I started being silly with my boyfriend at one point, which resulted in a pipe falling straight on the back of my head - headache for the rest of the night, haha. It's not worth playing, just get the frame built. 🙈)


Once you have the frame up and built, test every section to make sure it's fully in place and secure. You can then begin putting the acoustic blankets on.
Use either the velcro connectors or very strong zip ties to hold your blankets from the top via the grommets. If you have bought moving blankets without grommets, you may have to make them yourself with a grommet tool kit.
For my personal setup, I have 4 blankets (3 sides, 1 roof) + 2 more spare that I'd like to hang additionally inside for extra treatment. As yours might be a different size though, you will need to determine the amount of blankets needed. This may takes some testing to find out the best amount between not having enough and not overdoing it.


Also, make sure to place these correctly so that all sides are covered (no gaps), as well as remember to have a space that you can get in and out of the booth easily. I personally didn't get a specific 'door' panel, but I positioned the curtains to enable me to get in and out easily instead.
Ideally, you will have an acoustic blanket on top as a roof as well. You can use a lighter, more normal blanket/duvet for the roof, but the acoustic ones are better (I need to do this, but it's a lot of effort to get it up there atm).
Once you have assembled the pieces and checked everything is secure, congratulations - you have your vocal cage... I mean, booth!

Step 5: Installing equipment
This is my favourite step, as it means getting to put all your equipment in and decorating.


Recording device:
Based on the decision you made at the beginning of this whole process, you should know if your recording device (computer, Mac, laptop) is going to live inside or outside of the booth. This all depends on how quiet your device is and where your power outlets are.
If you can hear your device and it's causing a noise floor of above -60db in your recording, get it outside the booth.
Noise floor below -60db is pretty much the standard:To test your noise floor, you need to record at a normal speaking volume gain level and make no sound - just pure room and equipment ambience sounds. You then check the levels in your DAW. That's your noise floor. |
If you have a silent device/Mac or Macbook, you may be fine to have it in there. (I have a Mac Mini M4 which is completely silent - so mine lives in my booth). It's worth noting that the booth may not have a lot of airflow, so it's not so good for PC cooling.
Make sure you are able to plug in and connect your device up to its power source and internet access properly... and safely (remember, fire hazards with electrics!).
Another side note; some plug sockets can make squealing/hissing noises with certain electronics, so again - if you can hear it, get it out the booth.


Microphone + audio interface:
Hopefully, and I reeeeally mean hopefully, you will already have a microphone and interface setup before you build this booth. I won't talk through this, as that's an entirely new blog on brands, and everyone has their preferred setups and budgets (mine is a Neumann TLM103 and Audient ID14 MKII interface).
However, a couple of extra little things to consider:
Microphone placement & arm -
Do research into best microphone placement. I'm personally still testing this myself to get the best sound with least plosives, but I think I'm pretty much there (e.g. upside-down vs right-way up, proximity, capsule location etc).
Get a sturdy microphone arm that is smooth/quiet to use and properly takes the weight of your microphone. My TLM103 is a little on the heavy side, so I bought a RØDE PSA1 Professional Studio Arm and have no issues with it.
Microphone XLR cable -
Most of the time, it's okay to use the XLR cable that comes with your microphone.
But my personal preference after my Rode cable broke, is that I don't want to put up with a cheap cable (having worked with music peers, it's easy to spot a crap cable).
Get a nice quality one that'll last you a long time and have no digital interference.
Mogami are highly-rated, but expensive. If you have a look on Amazon though, there's a specific brand that uses Mogami parts, along with other highly reputable cable elements that you can try.
USB hubs & connections -
Small one that's easily forgotten; don't forget to make sure you have all the connections in your booth sorted, whether that be getting USB hubs and converters, XLR splitters (I don't use this but know some do), extension cords etc.
Keeping your vocal booth equipment cool -
I rarely have an issue with keeping my tools cool but during the Summer months, I definitely notice a heat. If you can, try finding things that can elevate your equipment up a little bit from the desk - anything that can enable a little bit more airflow through your interface or recording device for example, it'll help keep things from overheating.
Desk & chair:
Hopefully you will have found a desk beforehand that fits the measurements of your booth! A little desk in the booth is super handy for putting your monitoring equipment and keyboard / mice on. Try to give it a bit of sound treatment if you can (e.g. foam panels, blankets, soft toys), to help avoid any unwanted reverberations on your new booth desk.
Reminder!
Make sure your microphone arm can be placed on the desk! I had a bit of a nightmare finding one that would take exactly the position and sizes I needed, but it can be done. 🙈
Optional chair:
Consider getting a little chair too in case you need to do a more 'grounded' performance or really long recording session. A lot of VA's tend to record standing up (myself included), but if you have a job that requires lots of time and a more grounded, calm and natural tone like an audiobook, sometimes sitting down helps achieve that. I personally borrowed a small drum stool from my drummer boyfriend, and he hasn't asked me to take it out yet - so that's my solution. 😉
Make sure the chair doesn't squeak, click, or make any annoying noises!
Monitoring equipment:
This isn't an essential when you're starting out, but if you want to take voice-over to the next step; you should consider getting monitoring equipment. This is essentially a monitor screen connected to your recording device, so that you can control your device and see what's going on in your DAW/scripts etc.
Nightmare scenario without one: you record for ages, and find out it wasn't even recording the whole time because you couldn't see it on screen. (guilty of this happening to me before I got a screen...)
It's also essential if you want to get into anything such as ADR/video STEMs, animation work, or even just have LONG scripts that having on a phone is not easy to read.
Get a light, simple one with good screen clarity, put on a sturdy monitor stand to hold it up. Avoid screens that make electrical noise (hissing) as your microphone will pick this up.
Additional sound-absorbing and anti-reflection materials:
I find it helps to have additional bits in the booth to catch any unwanted frequencies in your voice and recordings.
Consider making hanging panels that have your standard square foam panels on them for additional soft surface for sound to absorb into.
I got cardboard sheets, stuck sound-foam on with hot glue, and hung them inside the booth with zip ties - pretty bodge job but it looks and sounds fine!
Bass traps are cool, in the corners and sides!
More blankets! Putting an additional layer of acoustic / moving blanket on the inside of your space can help eliminate any pesky reverb you might encounter.
Please do bare in mind not to put too many on the frame though as the frame won't be able to take infinite weight. You can also risk recordings sounding too 'boxy' if you fill it with too much material.
Any other blankets, soft furnishings, soft plushies - anything to prevent flat, reflective surfaces that can cause reverb on your voice.
If any equipment causes you issues, don't panic, you can find solutions - e.g. microphone arm vibrations or audio bounce? Cover it somehow with soft furnishings or change for a sturdy one + microphone cradle.


Other useful bits and bobs for your vocal booth:
Quiet mouse, keyboard and mouse mats! Don't forget this in your new booth space, for smooth use and minimal interference in your recordings.
Get a little basket that has voice-over essentials - honey, chewing gum, tissues, herbal sweets, water, lip balm, medicines like VapoRub and nose unblockers; anything you might need mid-session.
I also got a headphone/cup holder that's a godsend to prevent me from knocking my drinks over whilst recording. 🙈
Lights - test them before you install.
Avoid lights that get hot - that could be a fire hazard.
Avoid lights that have that annoying 'eeeeee' screechy tone whenever they are on, which is common in cheap LED lights. It will ruin your recordings.
Avoid putting in anything that could create reverb or tinny sounds! I put a cute little strawberry trinket bowl in my booth once, and it caused echo in my recordings, so I had to sadly move it out. 😅🍓
Keep your vocal booth clean!!
Now that you have your nice new shiny booth, don't neglect it by not cleaning!
Hoover and dust regularly:
Schedule in a time maybe once a month, if not every week, where you give the booth space a bit of a vacuum and dust.
Dust can collect in your equipment and cause muffle/interference, and can actually affect your voice in severe cases of dust build up. So keep it clean for your own vocal health and quality.
Of course, as with any cleaning, be careful with your equipment. E.g. Don't go hoovering your microphone or computer, you will break it.
Keep your floor area clear and tidy:
Cable management - keep wires tucked away or behind furniture. Not only does it look nicer, but it's safer for you to move around without pulling a wire out by accident. No one wants to lose internet connection mid-session with a live-direction client because they kicked out the ethernet cable.
The last thing you want is to trip over your chair, your rug or a cable and break your expensive equipment. Take special care to make sure there are no tripping hazards in your space, so you can move and act with ease.
Keep a tidy desk:
Keep organised by never leaving trash in your booth. It's so easy for garbage to pile up, and that can cause issues for your space (e.g rustling packets, smells, reverb, tripping hazards)
Don't eat smelly/greasy/wet/hot food in the booth - having honey and small snacks is ok, but don't sit in there with a KFC Boneless Banquet meal + side of gravy - that's a quick way to ruin your space. 🫣
Scents:
Let's be honest here - voiceover can be a sweaty, hot experience sometimes - especially in summer. Due to fans and aircon causing noise, it can mean your booth will become a bit of a hot box. Keeping yourself and your space clean will help you avoid any nasty odours or lingering grime. (Sorry to sound gross, but it's gotta be cared for to remain a comfortable experience)
Don't smoke or vape in your booth.
When you first buy your acoustic materials, they MAY have a chemical smell to them - which can be hard to work with at first when recording. To get rid of this, it's ideal to open / air out your blankets before building your space. If you have a garden, you could hang it outside in fresh air for better results.
This one is obvious but DO NOT light candles or incense in or near your booth. This is extremely dangerous and will risk causing a fire. Reminder that you are surrounded by cloth and flammable materials.
Try to avoid masking smells with really heavy scents like sprays, air fresheners or mists - not all are bad, but since you will breathe this in when acting, it's usually not good for your throat or lungs!
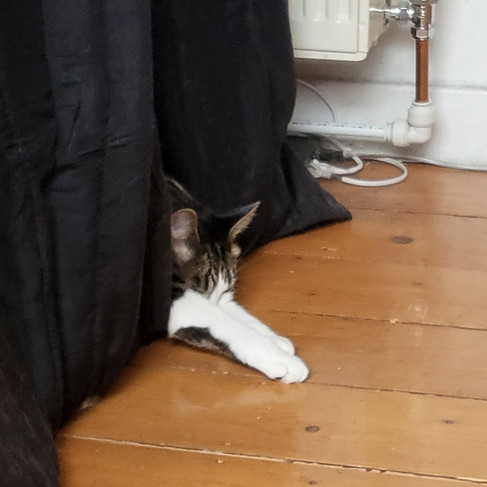
And finally, unlike me... perhaps keep pets out of your new booth in case they decide to stinky-fy anything. Let's be honest - pets can be smelly beans sometimes, so best to not let them get comfy in there. Plus, stopping their access means less fur to have to vacuum! (my smelly demon child below... 😂)


Final thoughts
Thank you for your time in reading my blog!
If you made it all the way down here and found any of this information useful, then I'm very glad! As mentioned earlier in the blog, I'm by no means a huge success in the popular VA sphere, but I've worked very hard with what I have to get work and am successful by my own standards.
There will be things that need improving in my booth space. But, it's better than nothing and I take pride in the fact I have this resource - and I wish anyone who wants to take voiceover seriously to do similar to pursue their dreams.
If you are a professional voice over artist with your own setup and you wish to discuss anything I have mentioned in the above (whether it's a criticism or additional tip or photos), please do get in touch as I'd love to keep this updated with good advice.
If you have any questions about my space, please do get in touch.
Peace out! x